Hugo 博客集成 Mastodon
- 5 分钟阅读
- CC BY-SA 4.0

Hugo 博客集成 Mastodon
说明
所有博客类型(Hugo、Hexo、Wordpress 等)都可以通过这个 JS 插件集成 Mastodon。本文以 Hugo 为例。
前言
我的博客子栏目「
嘀咕」这个微博客(说说、自言自语),几经变迁,现在进化到了集成 Mastodon 时间线。可以把发布在联邦宇宙中的嘟文集成到博客中来。
应邀写一篇博客整理一下实现过程。
PS:Mastodon 是一个专有名词,像 Iphone mAcOs 一样,别写错了,很尬。
选型
- API or RSS
Mastodon 提供 API(Json)和 RSS 两种信息流输出,可以选一种方式集成。
- SSG or JS
Hugo、Hexo 等 SSG 类型的博客可以构建时渲染成静态内容,也可以用 JS 动态集成。
在早期为了极致的加载速度,我采用静态渲染的方式,发布一条嘟文时,构建一次 Hugo,但是现在构建一次 Hugo 要 3 分多钟,改为用 JS 的方式实时调用 API 了。
- 我的方式:API + JS
我是用 https://github.com/eallion/mastodon-embed-timeline 这个 JS 包集成的。简单方便易维护。
预览:
安装
有 3 种方式安装 mastodon-embed-timeline
参考说明文档: README#installation
我选择的是通过 git submodule 子模块的方式加载,相当于文档中下载的安装方式。
在博客根目录执行:
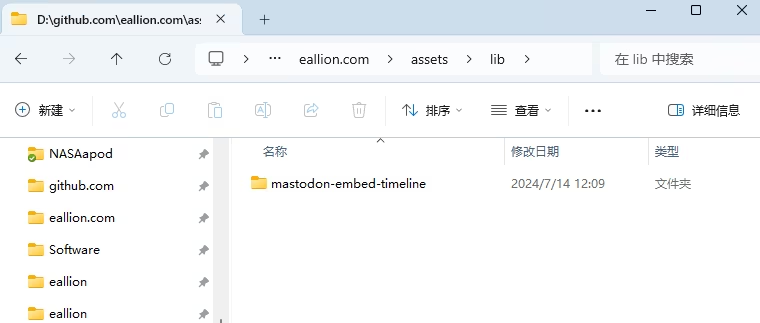
git submodule add https://github.com/eallion/mastodon-embed-timeline.git assets/lib/mastodon-embed-timeline
把 mastodon-embed-timeline 下载到博客的 assets/lib 这个目录,这个目录可以随便选,只要记得这个路径就可以了。

注意事项:
- 在另外的电脑上 Clone 博客后,要执行
git submodule update --init --recursive才能同步克隆子模块。 - 子模板有更新时,执行
git submodule update --remote --merge更新子模块。
新建模板
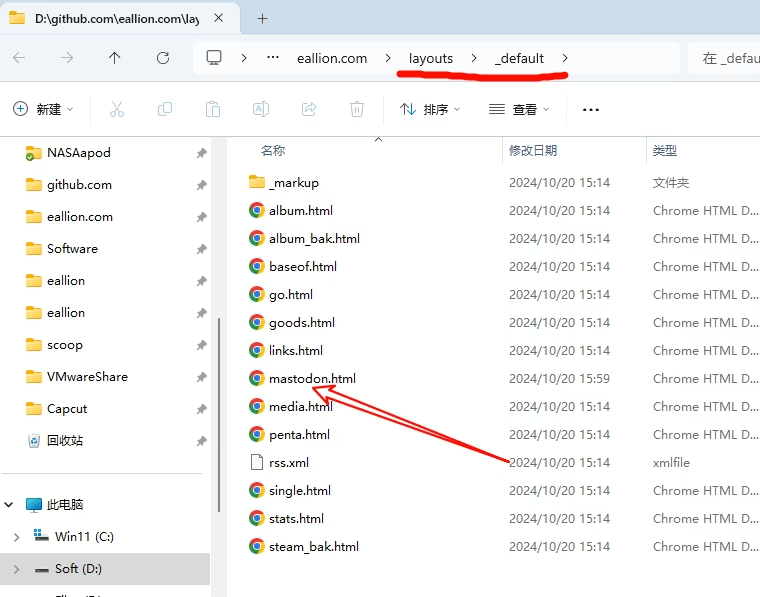
在博客的根目录的 layouts/_default 下(没有可以创建),新建一个 mastodon.html 文件。按 Hugo 的构建规则
Docs 尽量不要去 themes 的 layouts 目录创建,除非你本人是当前主题的开发者。
更好的方式可以从主题的 themes/xxx/layouts/_default 复制一个模板文件过来,改名为 mastodon.html。mastodon.html 可以是其他名字,如 bb.html shuoshuo.html whisper.html

模板内容
参考:
模板文件 mastodon.html 需要与主题的结构兼容(所以最好的方法是从主题中复制一个差不多的过来),主要修改三个地方:
1. 引入 CSS
在模板文件的靠前部分插入下面的 CSS。
两个方式二选一:
<!-- git submodule 方式 -->
{{ $mastodonCss := resources.Get "lib/mastodon-embed-timeline/dist/mastodon-timeline.min.css" | minify | fingerprint "sha256" }}
<link rel="stylesheet" href="{{ $mastodonCss.RelPermalink }}" integrity="{{ $mastodonCss.Data.Integrity }}" crossorigin="anonymous">

<!-- CDN 方式 -->
<link rel="stylesheet" href="https://cdn.jsdelivr.net/npm/@idotj/mastodon-embed-timeline@4.4.2/dist/mastodon-timeline.min.css" integrity="sha256-1UGgxsonaMCfOEnVOL89aMKSo3GEAmaRP0ISbsWa6lU=" crossorigin="anonymous">
如果有自定义的 CSS 样式需要,可以参考:
2. 引入 JS
在模板文件的结尾部分插入下面的 JS。
两个方式二选一,是否使用 ESM 版本的 JS 自行决定,不懂就无脑用 UMD 版本:
<!-- git submodule 且 ESM 方式 -->
{{ $js := resources.Get "lib/mastodon-embed-timeline/dist/mastodon-timeline.esm.js" }}
<script type="module">
	import * as MastodonTimeline from '{{ $js.RelPermalink }}';
	const myTimeline = new MastodonTimeline.Init();
</script>

<!-- CDN 方式 -->
<script src="https://cdn.jsdelivr.net/npm/@idotj/mastodon-embed-timeline@4.4.2/dist/mastodon-timeline.umd.js" integrity="sha256-E6WPG6iq+qQIzvu3HPJJxoAeRdum5siq13x4ITjyxu8=" crossorigin="anonymous"></script>
3. 配置 Mastodon
在引入 mastodon-timeline.umd.js 之后,修改下面这些配置(并非所有参数都需要配置)
<script>
	const myTimeline = new MastodonTimeline.Init({
		// 包含时间线的 <div> 的 ID
		mtContainerId: "mt-container",

		// Mastodon 实例的 URL,包含 https://
		instanceUrl: "https://mastodon.social",

		// 选择要在时间线中显示的帖子类型:'local', 'profile', 'hashtag'
		// 默认:local
		timelineType: "profile",

		// 你在 Mastodon 实例上的用户 ID 号
		// 如果你没有选择 'profile' 作为时间线类型,请留空
		userId: "107666",

		// 你在 Mastodon 实例上的用户名(包括开头的 @ 符号)
		// 如果你没有选择 'profile' 作为时间线类型,请留空
		profileName: "@eallion",

		// 标签的名称(不包括 # 符号)
		// 如果你没有选择 'hashtag' 作为时间线类型,请留空
		hashtagName: "",

		// 加载旋转器的类名(也在 CSS 文件中使用)
		spinnerClass: "mt-loading-spinner",

		// 首选颜色主题:'light', 'dark' 或 'auto'
		// 默认:auto
		defaultTheme: "auto",

		// 向服务器请求的最大帖子数量
		// 默认:20
		maxNbPostFetch: "40",

		// 在时间线中显示的最大帖子数量
		// 默认:20
		maxNbPostShow: "20",

		// 根据选择的语言/国家指定日期格式
		// 默认:英式英语(日 - 月 - 年顺序)
		dateLocale: "en-US",

		// 使用选项自定义日期格式
		// 默认:DD MMM YYYY
		dateOptions: {
			day: "2-digit",
			month: "short",
			year: "numeric",
		},

		// 隐藏未列出的帖子
		// 默认:不隐藏
		hideUnlisted: true,

		// 隐藏转发的帖子
		// 默认:不隐藏
		hideReblog: false,

		// 隐藏回复帖子
		// 默认:不隐藏
		hideReplies: true,

		// 从个人资料时间线中隐藏置顶帖子
		// 默认:不隐藏
		hidePinnedPosts: true,

		// 隐藏用户名下的用户账号
		// 默认:不隐藏
		hideUserAccount: false,

		// 将文本内容限制为最大行数
		// 使用 "0" 表示不显示文本
		// 默认:""(无限制)
		txtMaxLines: "",

		// 自定义用于显示/隐藏敏感/剧透文本的按钮文本
		btnShowMore: "显示更多",
		btnShowLess: "显示更少",

		// 将 Markdown 符号 ">" 转换为块引用 HTML 标签
		// 默认:false(不应用)
		markdownBlockquote: false,

		// 隐藏服务器上的自定义表情符号
		// 默认:不隐藏
		hideEmojos: false,

		// 自定义用于显示敏感/剧透媒体内容的按钮文本
		btnShowContent: "显示内容",

		// 隐藏视频预览并加载视频播放器
		// 默认:不隐藏
		hideVideoPreview: true,

		// 自定义用于加载和播放视频的按钮文本
		btnPlayVideoTxt: "加载并播放视频",

		// 如果帖子包含来自 URL 的链接、照片或视频,则隐藏预览卡片
		// 默认:不隐藏
		hidePreviewLink: true,

		// 将预览文本描述限制为最大行数
		// 使用 "0" 表示不显示文本
		// 默认:""(无限制)
		previewMaxLines: "",

		// 隐藏回复、转发和点赞的帖子计数器
		// 默认:不隐藏
		hideCounterBar: false,

		// 当用户点击帖子中的图片时显示轮播/灯箱
		// 默认:不关闭
		disableCarousel: false,

		// 自定义轮播/灯箱的按钮文本
		carouselCloseTxt: "关闭轮播",
		carouselPrevTxt: "上一个媒体项",
		carouselNextTxt: "下一个媒体项",

		// 自定义指向 Mastodon 页面的按钮文本,放置在时间线末尾
		// 留空以隐藏
		btnSeeMore: "在 e5n.cc 查看更多帖子",

		// 自定义重新加载帖子列表的按钮文本,放置在时间线末尾
		// 留空以隐藏
		btnReload: "刷新",

		// 在构建时间线之前继续搜索主 <div> 容器。在某些情况下很有用,需要额外的时间来渲染页面
		// 默认:不应用
		insistSearchContainer: true,

		// 定义继续搜索主 <div> 容器的最长时间
		// 默认:3 秒
		insistSearchContainerTime: "3000",

	});

</script>
新建页面
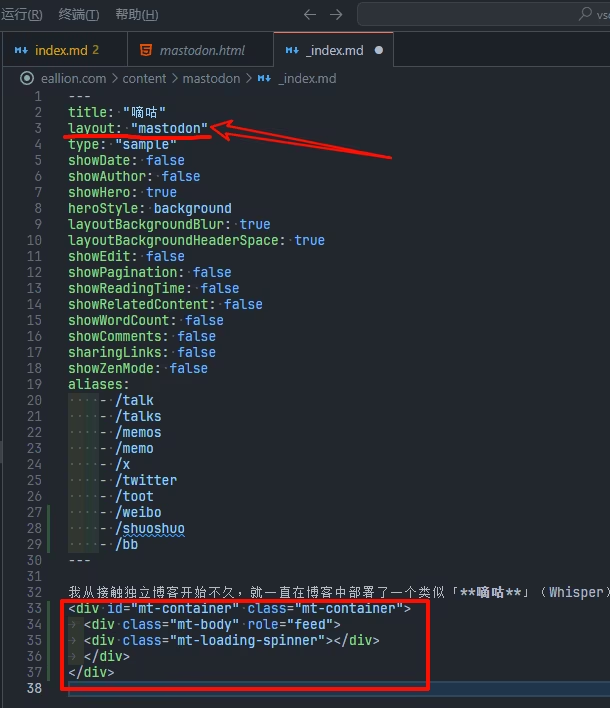
在博客的 content 目录新建一个页面,如 mastodon.md 用来显示 Mastodon 的独立页面。有的主题的独立页面结构可能是 mastodon/_index.md。
Front Matter 里需要指定 layout 的名称,要跟模板名称对应上。
在此 mastodon.md(或 _index.md)文件中插入以下内容,用于渲染 Mastodon 的 Dom 容器:
<div id="mt-container" class="mt-container">
	<div class="mt-body" role="feed">
	<div class="mt-loading-spinner"></div>
	</div>
</div>

小技巧:Hugo 自带 aliases 参数,在 Front Matter 里写上这个参数,可以把这些需要的页面重定向到此页面,不需要另外新建那些页面。
其他
另外我的页面中,实现了 2 个小功能:
针对国内访客,劫持图片链接,替换成国内 CDN 实现加速;
拦截白名单外的域名,添加跳转提示。
这些修改都不破坏 git submodule 引入的子模块的完整性。
可在源码中查看:
layouts/_default/mastodon.html